We have all seen these around! If you don’t have one already, now is the time to make one. This is an easy Tie Blanket that anyone can make and requires NO SEWING! They are so cozy and soft, perfect for laying on the couch, watching our Knights in the playoffs. GO KNIGHTS GO! They also make for great gifts. This tutorial will show you how I personally like to make my knot blankets and a few tricks to make the process go a little faster.
List of supplies:
2 yards of your favorite VGK pattern fleece. Click on the picture to find these products on Amazon:


2 yards of your favorite matching color: (red) https://amzn.to/2Df7QAo
Multipurpose or Fabric Scissors: https://amzn.to/2De9P7W
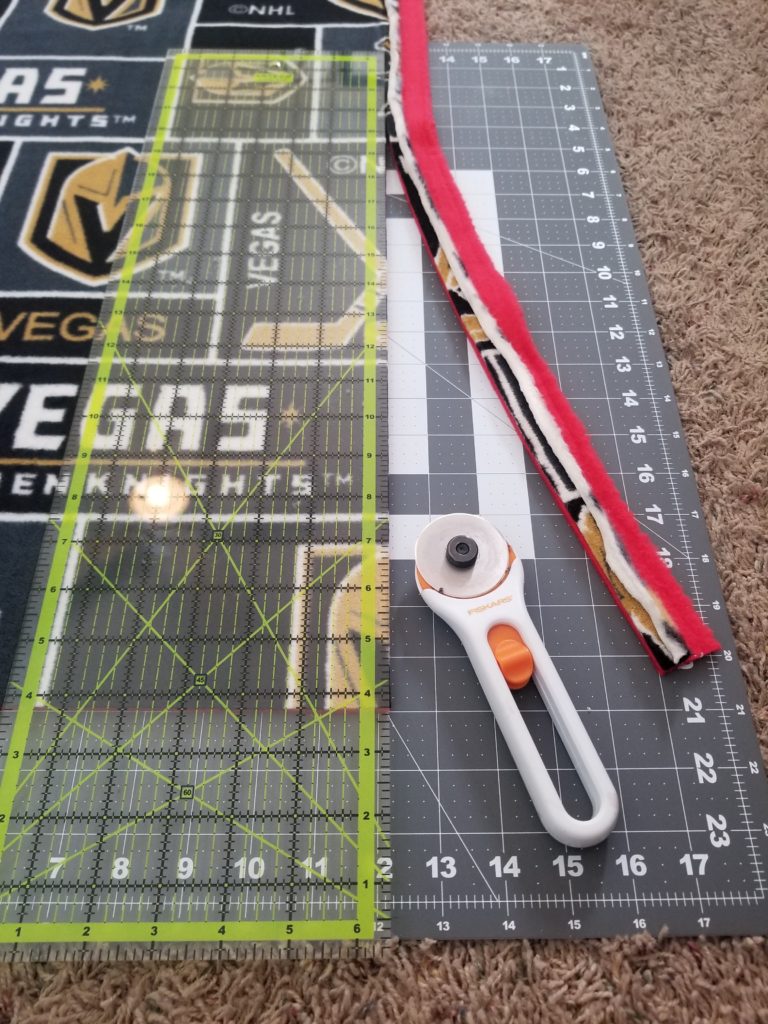
Self-Healing Rotary Cutting Mat (not necessary): https://amzn.to/2InWNsS
Rotary Cutter (not necessary): https://amzn.to/2UXwjnX
5×5-inch cardboard square (not necessary)

Step One:
Purchase all your items to complete tutorial. Online shopping and store pick ups have been such a blessing in my busy life. You can find all your necessary items on the Amazon links provided. You can also do an online order with Joann’s; it is such a breeze to go straight to the check out line and ask for your order.
Step Two:
Prepare your fabric. I like to cut off the NHL information (I’m making these items for myself and/or giving them as a gift). Lay your fabric on any large surface area, the living room floor works perfect. Pick a place where you don’t need to move the blanket until you’re completed.

Making sure you don’t stretch the fabric, but loosely place your fabric layered on top of each other. This way you can trim the sides of both fabrics at once.

You can place your cutting mat under the edge, use your plastic ruler as a guide, and cut both layers of fabric with your rotary cutter (press down with a little bit of force to go through both layers). One tip of advice: Make sure your VGK fabric is flipped on the correct side, you don’t want to finish your blanket and realize the wording is backwards.
Step Three:
Time to start cutting your strips that you will be knotting. Slide the cutting mat under one corner. Place your 5×5 inch carboard square as a guide to cut along. Repeat process with each corner.

You will be left with 4 5×5 inch square holes. Now you will start to cut your strips. Place your plastic ruler 5 inches from the edge; it will serve as a guide to where your rotary cuter needs to stop. I like to cut 1 ½ inch strips. If you line up your cutting mat under your blankets edge it will give you the inches to cut along. Move the cutting mat as you move down, cutting strips down the side of the blanket.


Step Four:
Now it’s time to knot the strips together. There are different techniques out there, but I like to double knot my strips. I have two boys and a dog who sheds, I like to know my blanket stays knotted when I throw it in the wash. I have never tested out the other techniques, probably just nervous, so I stick to what works for me. The one thing I like to do is alternate my colors while I double knot them. If you knot the right side over the left side and then pull through, on the next knot take the left side over the right side and then pull through. Keep alternating around the whole blanket.


We hope you’ve enjoyed this tutorial. Check back next week for another fun way to use this technique on another project.
To find more great crafts like this, head over to our craft section!