Valentine’s Day is quickly approaching, and those letters should start coming home to decorate your box for school! All of those lil’ hockey fans out there can show their love for hockey with this easy ice rink tutorial.
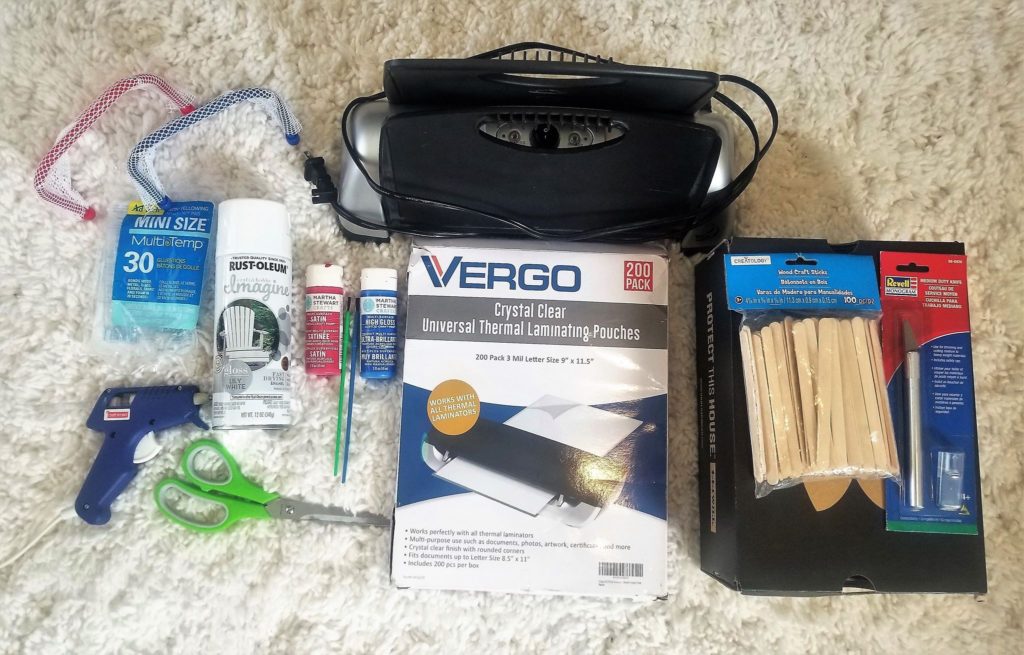
Table of Contents
Supplies
Kid’s shoe box
White Spray Paint
Red Acrylic Paint and Paint Brush
X-Acto (exacto/hobby) Knife
Scissors
Red and Blue Sharpie Markers (not in picture)
Glue Gun
Popsicle Sticks
Laminator and Laminator Sheets
Hockey Nets
Favorite Team Stickers
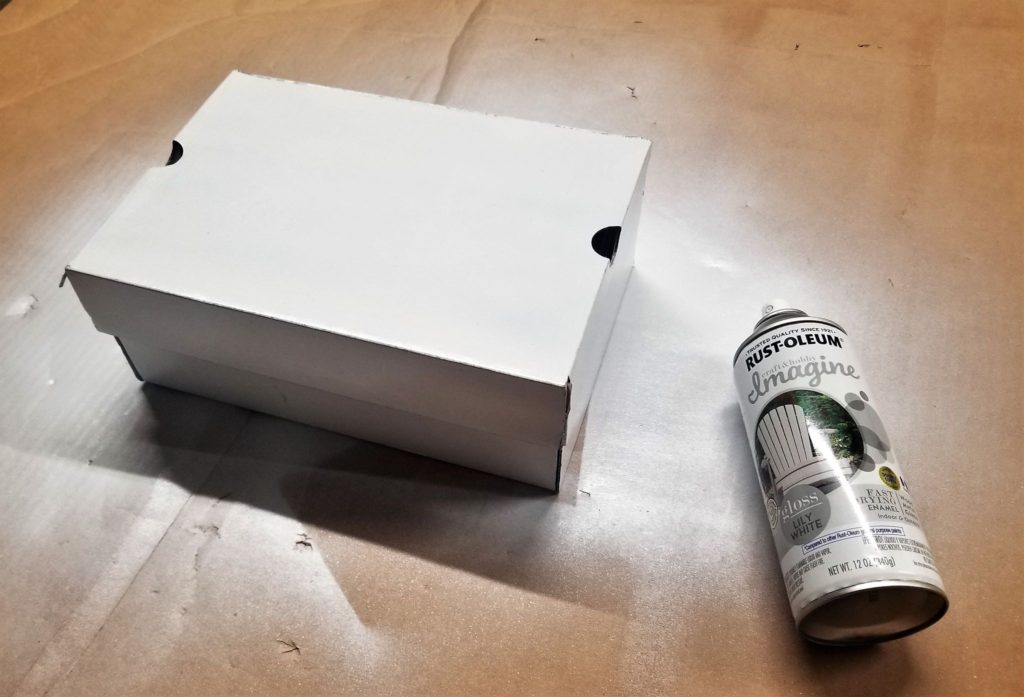
Step One: Paint Your Box
(Steps one and two should be completed by an adult.) In a well-ventilated area, place your shoe box on a piece of old cardboard and spray all sides with an even coat. If you don’t have spray paint you can paint them with white acrylic paint. Let dry.
Step Two: Valentine Slot
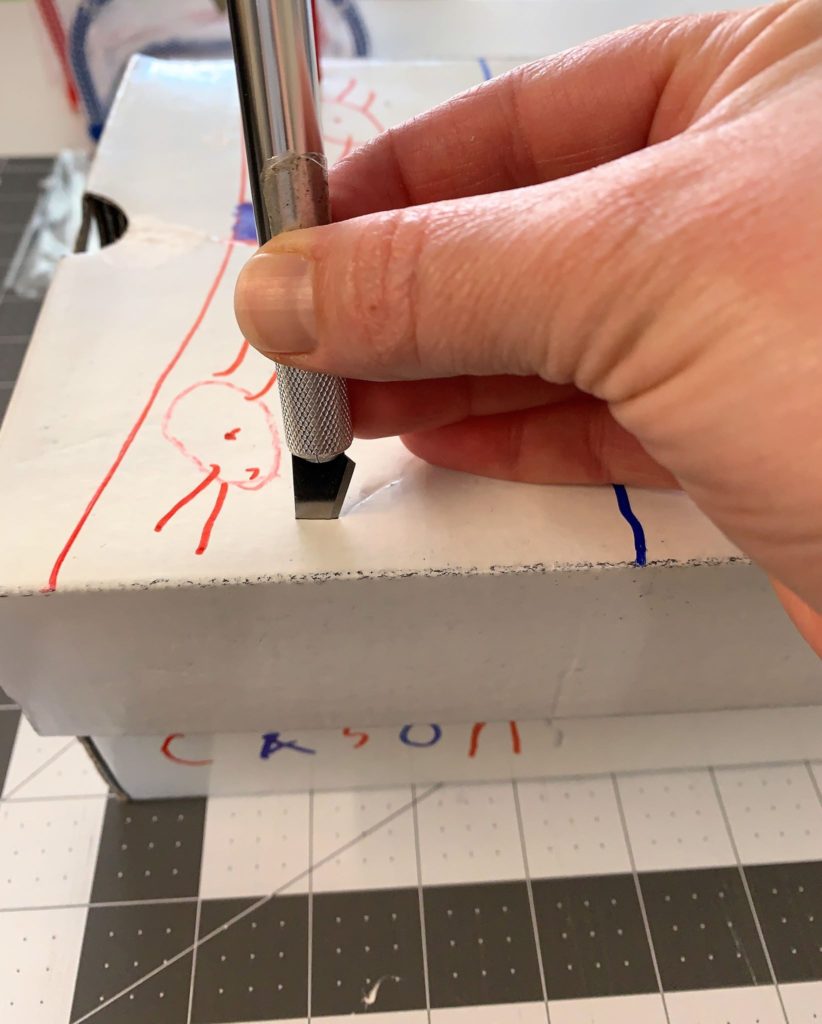
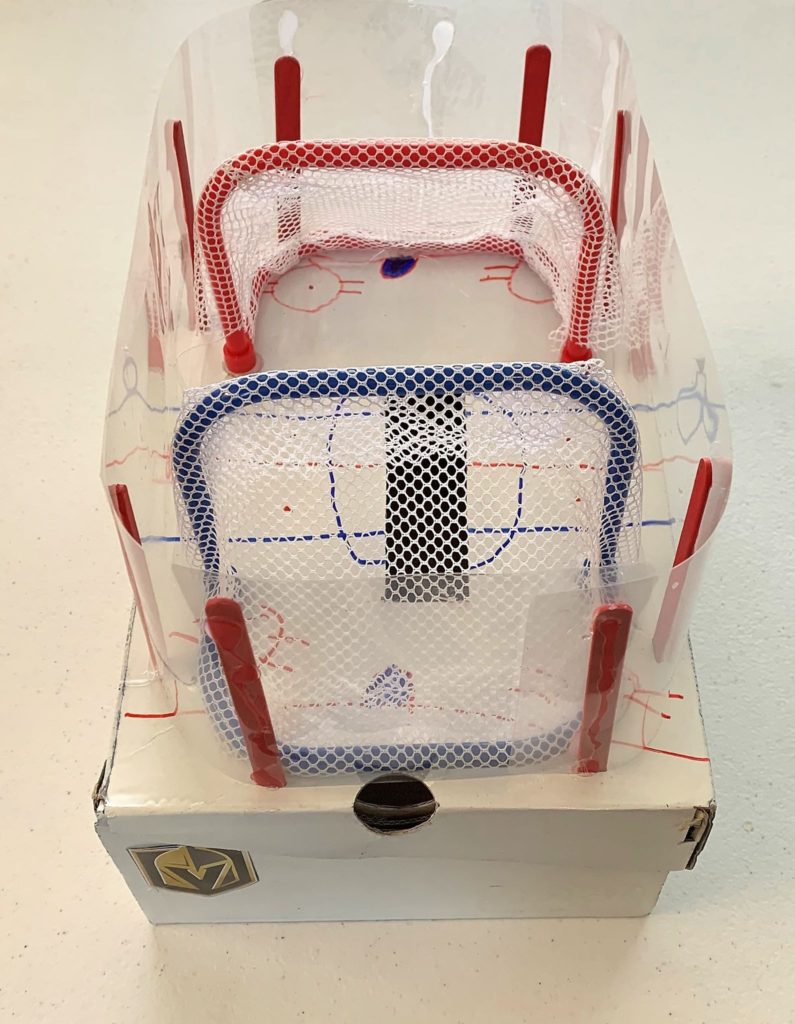
Cut a slot in your shoe box with your exacto knife, big enough for valentines to drop in. You can place the slot on either the top or the side of the box.
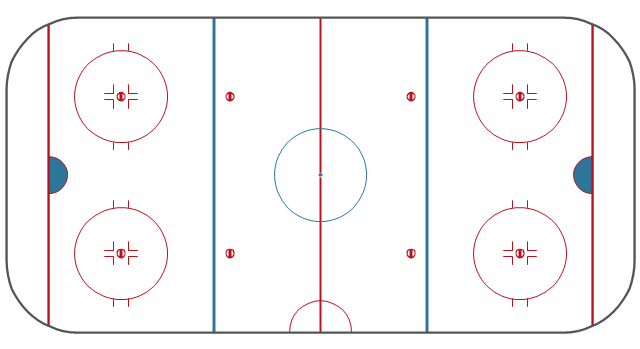
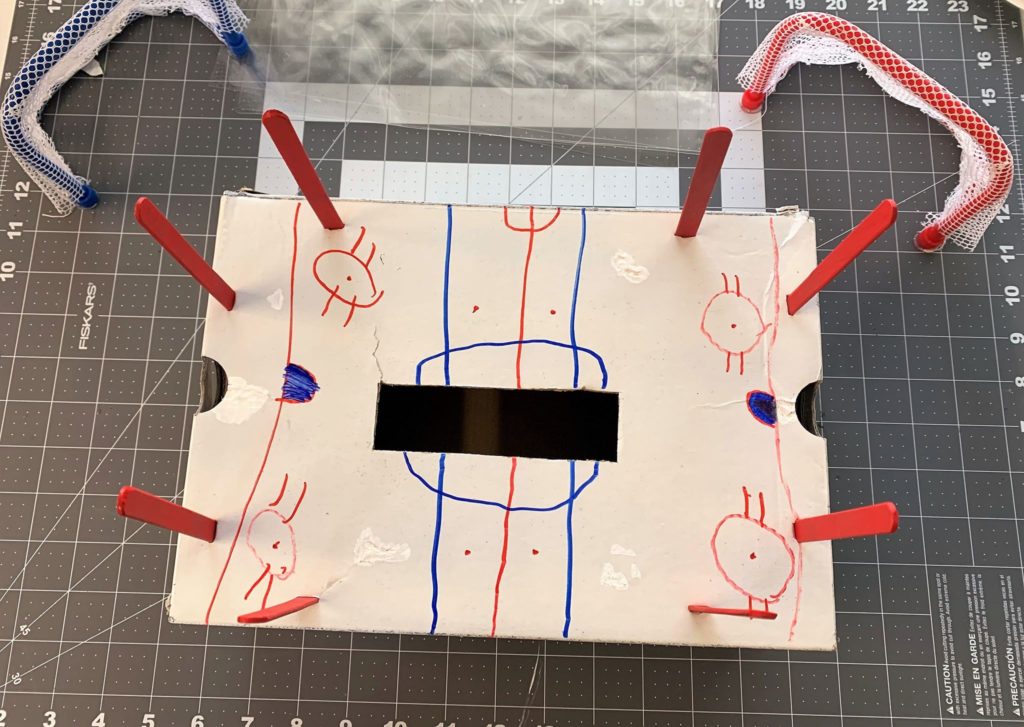
Step Three: Draw The Ice Rink
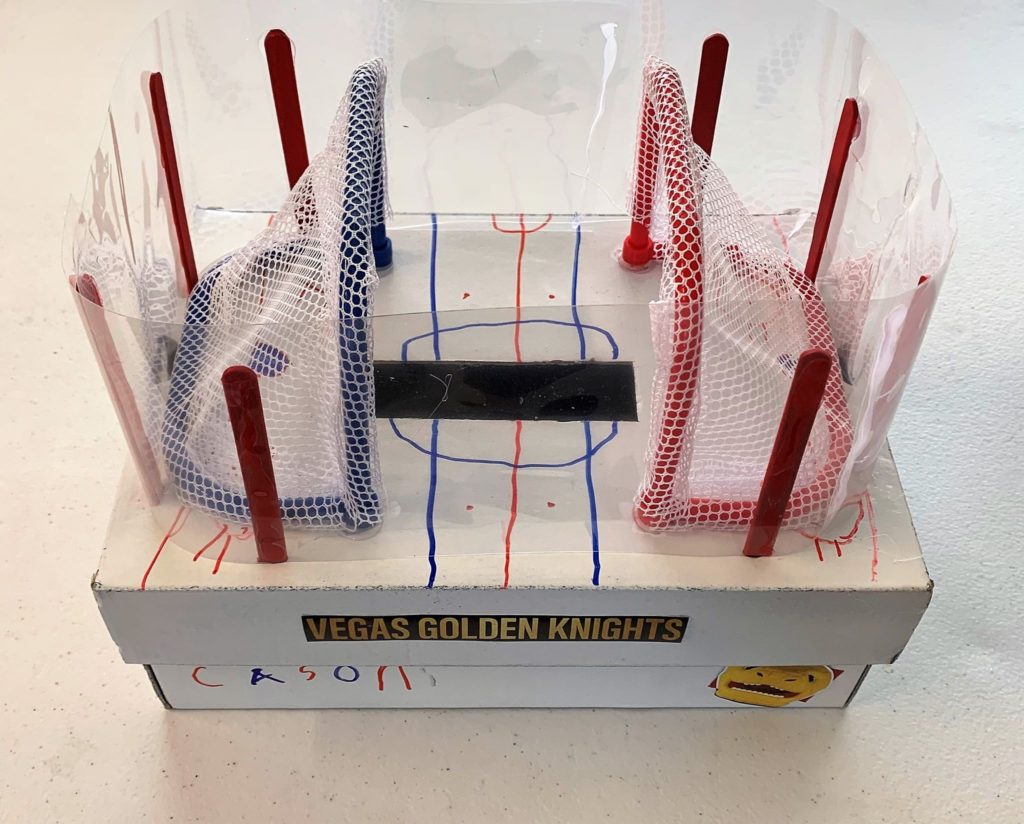
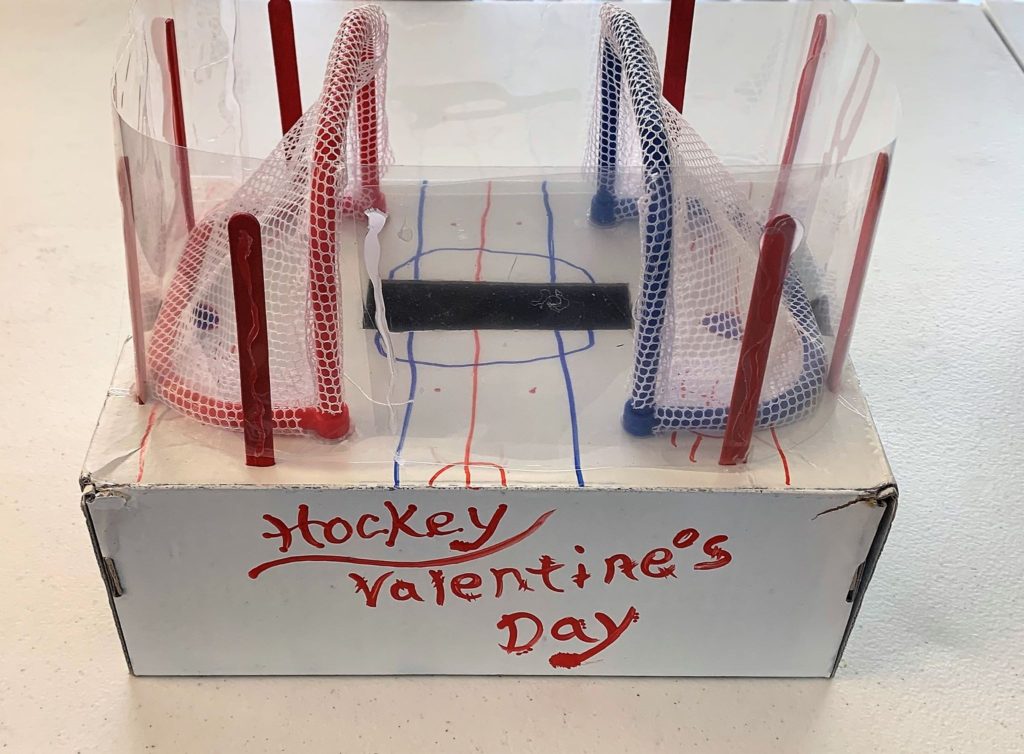
These next steps are where your child can help with their Hockey Valentine’s Day Box for school. Print out, or show, a sample of the ice rink layout for your child to draw on top of the box. I first thought my son would paint this part, but decided sharpie markers were the best route.
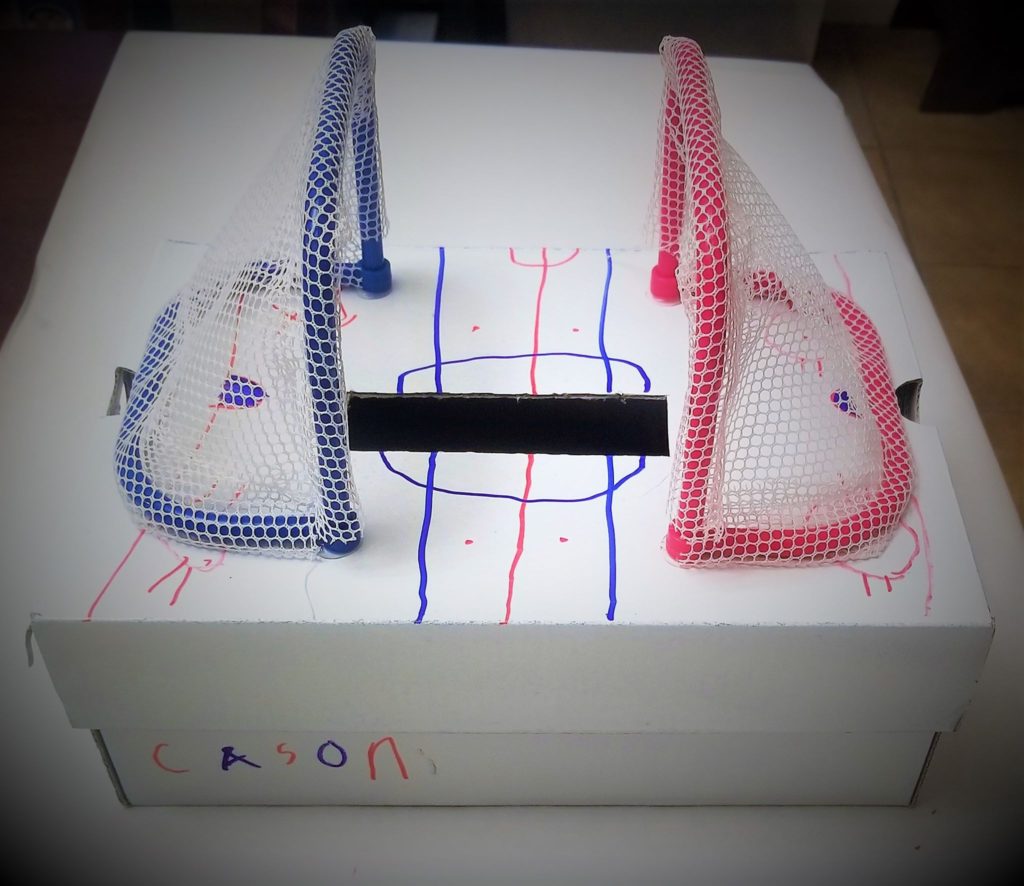
Depending on what supplies you are able to find, this might be your last step. You can have your child color their favorite hockey team logo, print one out, or have some stickers they can add. If you have small hockey nets you can glue them down and stop here.
Step Four: Build Boards and Glass
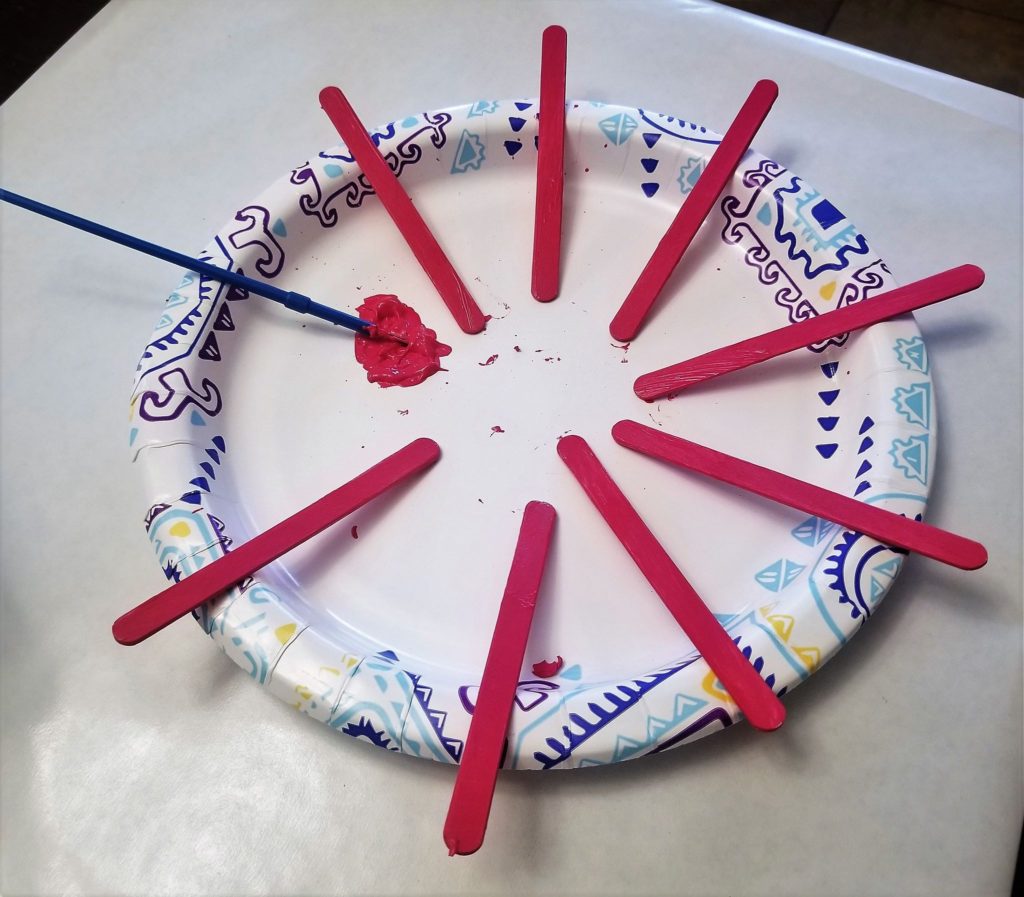
Paint 8 popsicle sticks red (front and back).
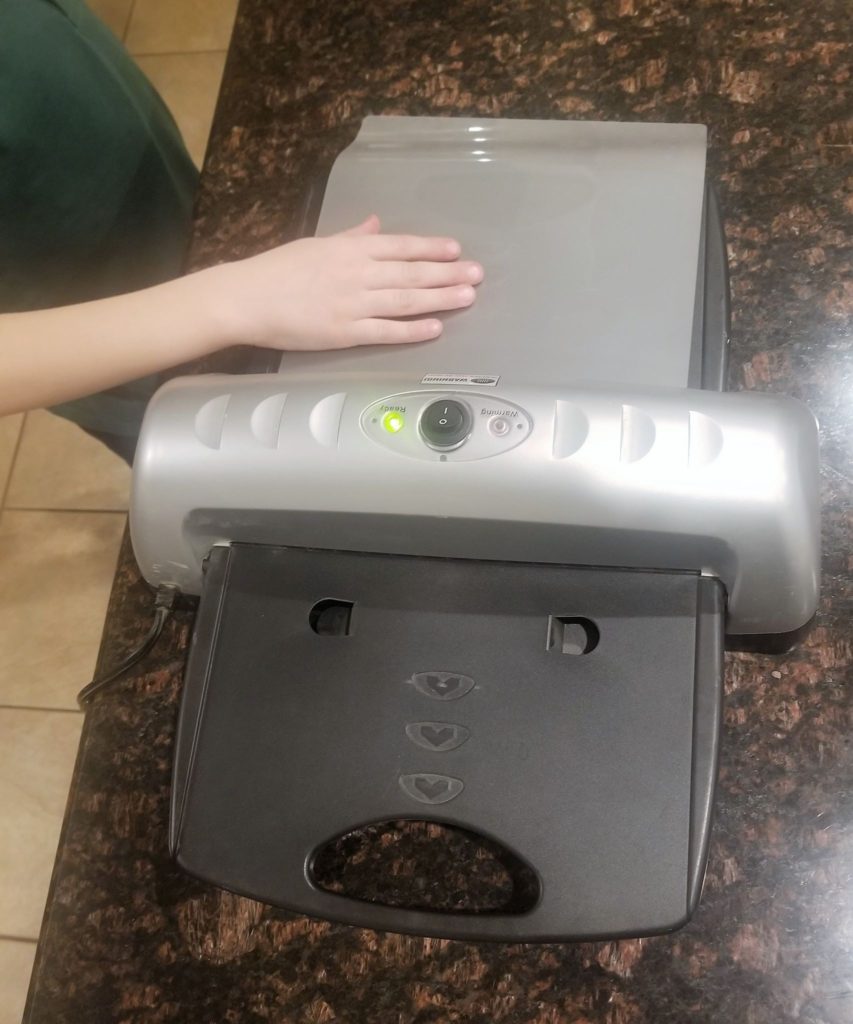
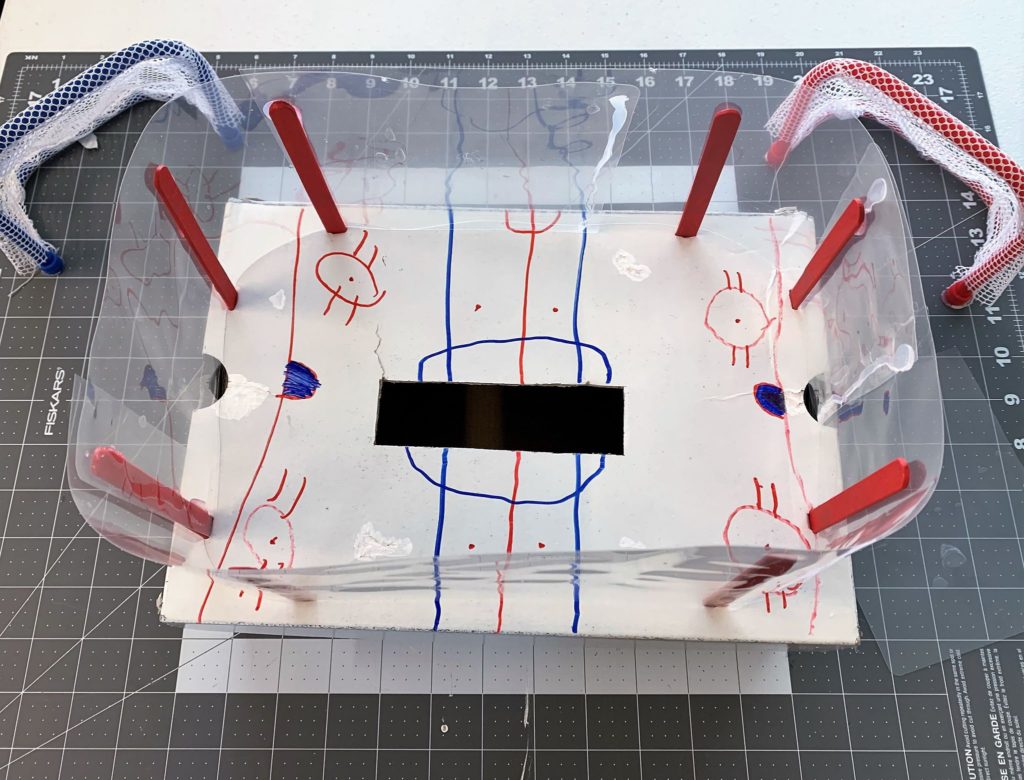
While the sticks dry, prepare 2 laminator sheets by putting them through the laminator so they become see-through.

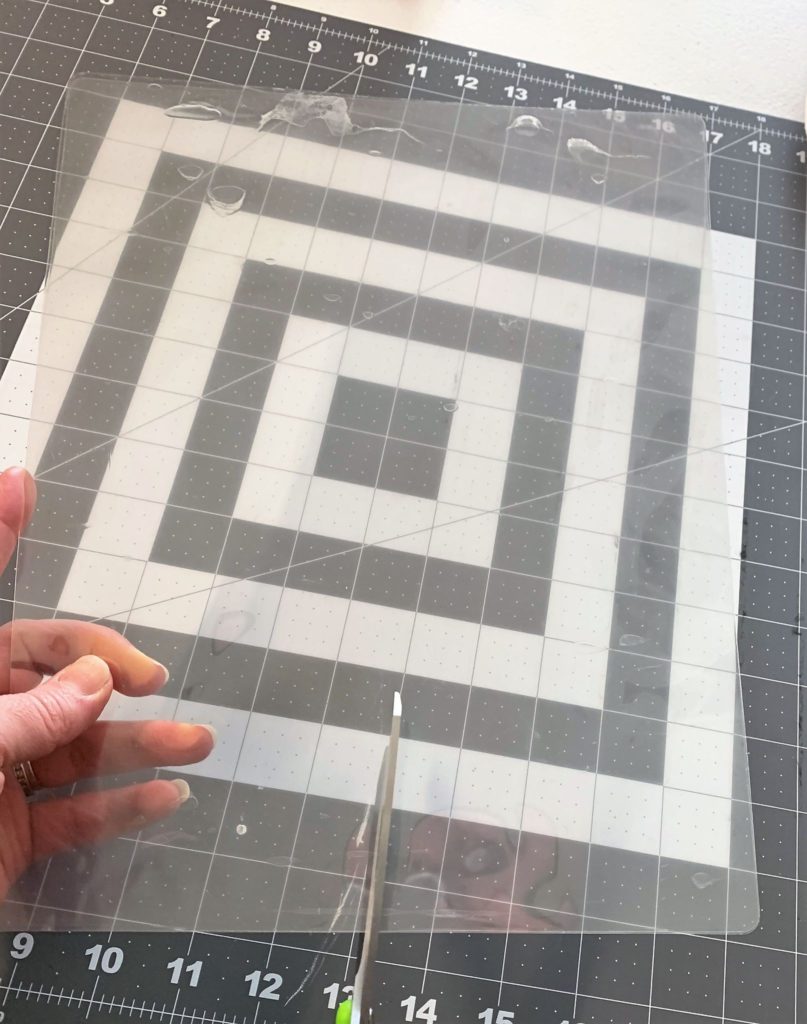
Cut them lengthwise down the center. This will give you a little more than enough to go all the way around the box.
Next, an adult will want to cut small slices in the box for the popsicle sticks to fit in. If your shoe box has a lid that comes off, you can glue the sticks to the side of the lid. The box we chose did not have a lid that came off. We would not have been able to open the box without messing up the “glass” if we glued them on to the sides.
Place glue onto the outside of one popsicle stick and secure a strip of laminator sheet to it.
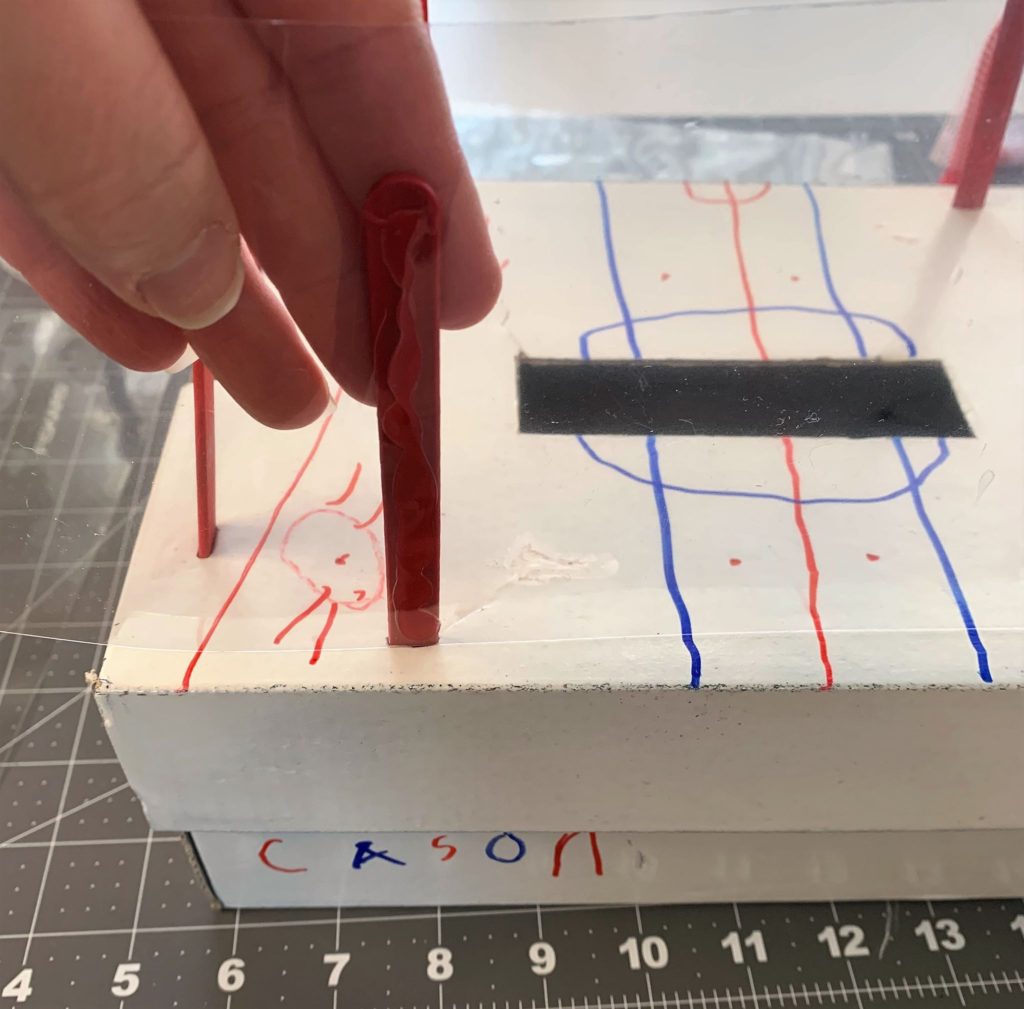
Continue this process around the box with every stick. Once your laminator strip comes to the end, glue on another strip.
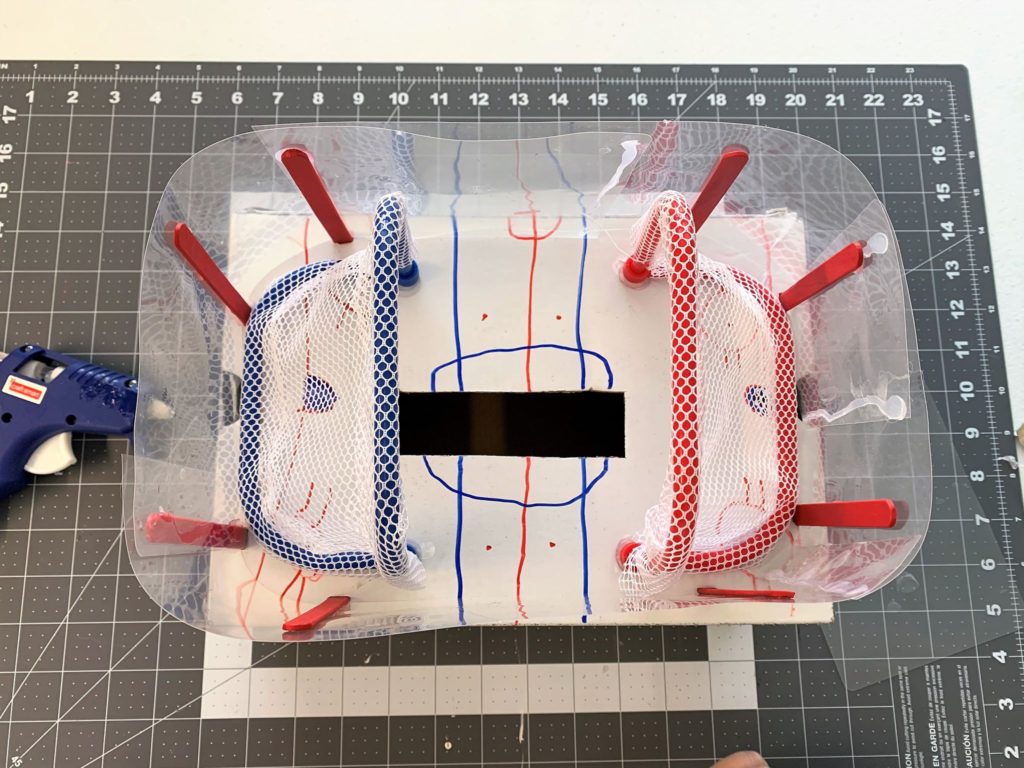
Step Five: Decorating
Add some glue onto the bottom of your hockey nets and place them on both sides of the ice. We already had these nets at the house, but saw online that a good option would be to cut red solo cups to make them look like goals. You might also find cake decorating supplies online, like mini hockey figurines and nets.
We cut our Vegas Golden Knights logos from old game posters we had and glued them on. You could also use stickers or print pictures from your computer. (This step could be completed when your child is drawing the ice rink as well). Once you’ve added your stickers/cutouts, you’re done!
With a little time and effort, your child could have a unique Valentine’s Day box that’s sure to be a hit with the whole class!
Send us pictures of YOUR Vegas Golden Knights themed Valentine’s Day box!