Today I’m going to show you how to create this cute Vegas Golden Knights wood sign. I made this for my mother-in-law to give as a gift to some clients who shared their season tickets with her. You can use this for yourself or give as a gift to a fellow Knights fan. Feel free to customize it to fit your style. Note: This tutorial is for an intermediate to advanced crafter. However beginner crafters may find it inspiring as well.
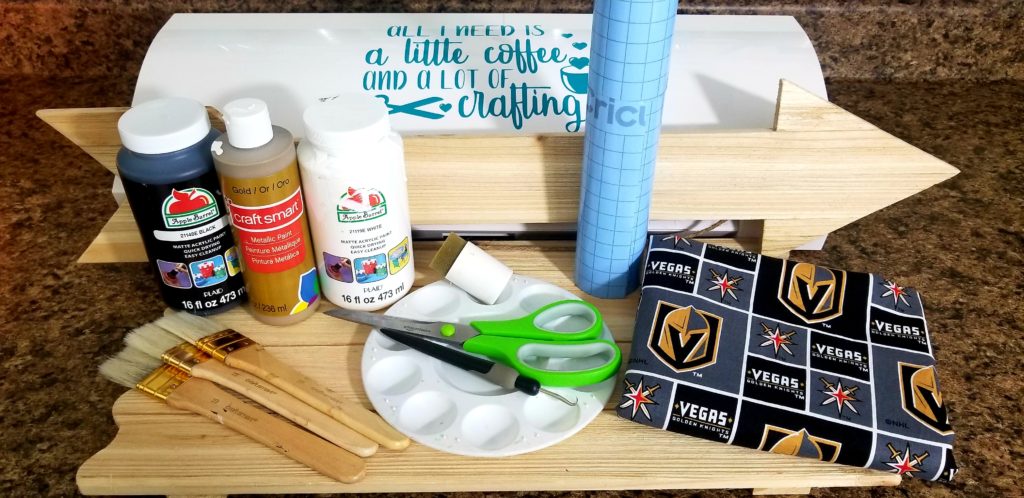
Table of Contents
Supplies
Unfinished Wood Panel Sign
Unfinished Wood Arrow
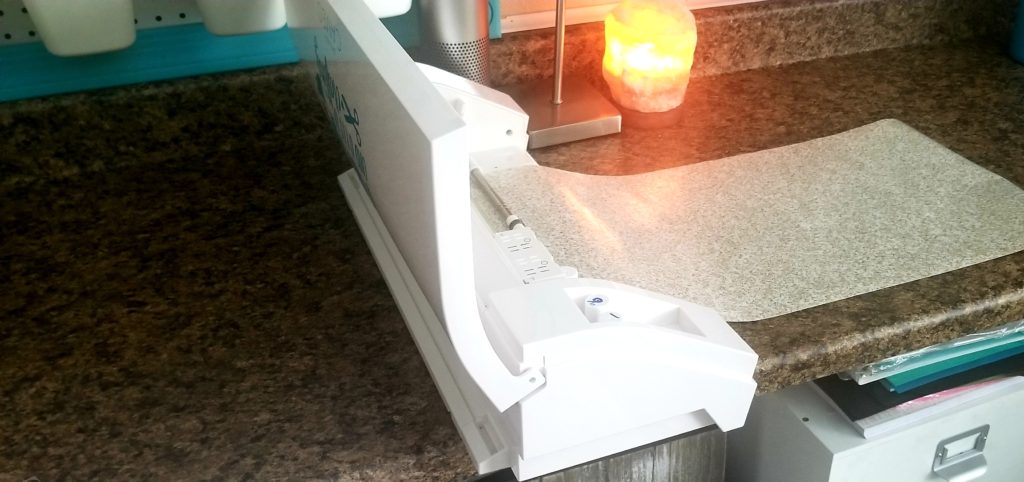
Silhouette Cameo or Cricut**
Contact Paper (Dollar Tree) or Stencil Paper **
Contact Paper (Dollar Tree) or Transfer Paper ** (Included in Silhouette Cameo Bundle. Link above)
Weeding Tool ** (Included in Silhouette Cameo Bundle. Link above)
Scraper ** (Included in Silhouette Cameo Bundle. Link above)
Black and Gold Acrylic Paint
Mod Podge – Gloss (not in picture) **
Craft Sponge
Scissors
Paint Tray or Paper Plate
Paint Brushes
VGK Cotton Fabric (Optional)
Drill and Drill Bit 1/4 in.
Wood Screws 1-2 in.
Most supplies can be found at Michael’s, local craft store, or Amazon **
Step One: Painting
Paint the base color onto your wood pieces. I decided to paint the larger piece of wood black, and the wood arrow gold. You might need multiple coats of gold, depending on the quality of paint you get and because it’s a lighter color.
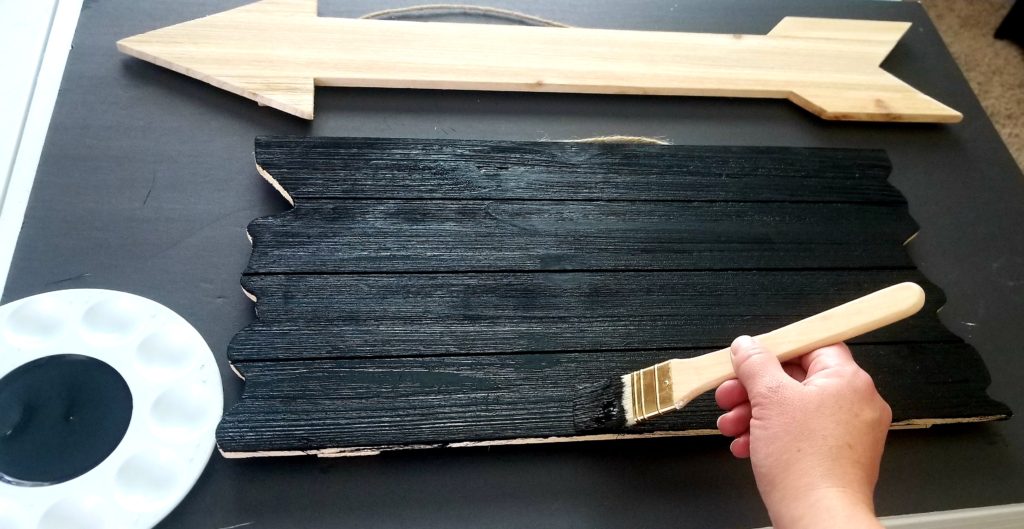
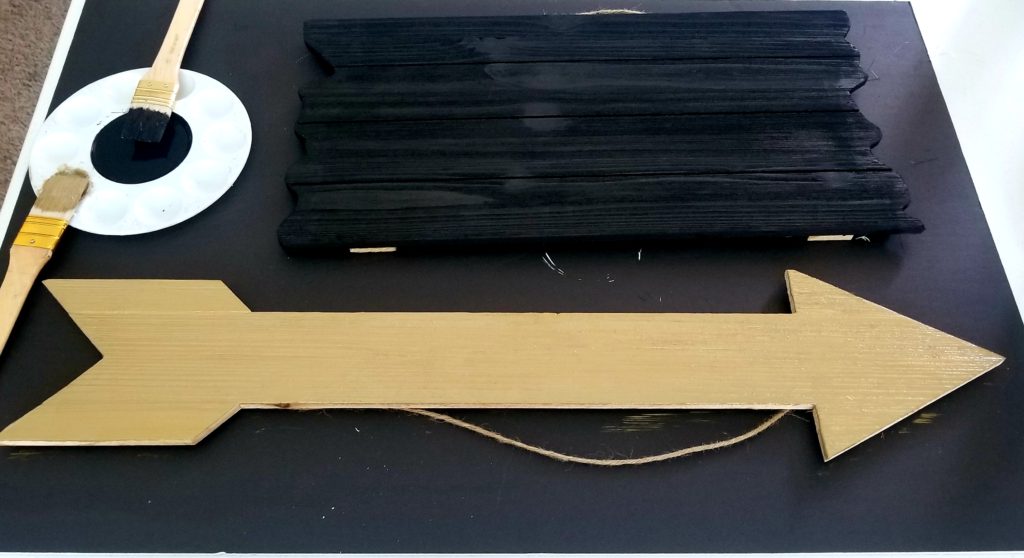
Let the pieces dry before moving onto the next step. Tip: A small fan can speed up the process.
Step Two: Design Your Stencil
Design the stencils in your Silhouette* or Cricut software (included in the purchase of your Silhouette) and size them to fit on the wood. I knew I was going to screw the arrow onto the top of the rectangular piece of wood, so I needed to take that into consideration when I was creating my stencil size. *If you are new to the Silhouette software and design process, send an email to rachelle@vgkladies.com, and she’ll assist you.
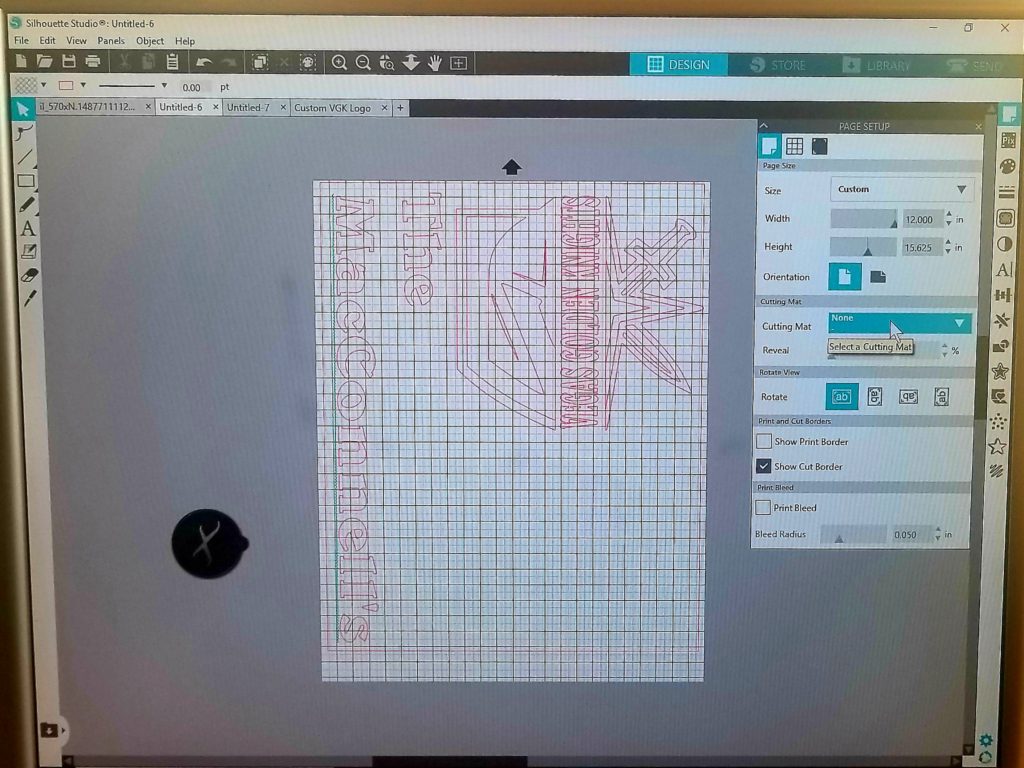
Step Three: Cutting
I created a stencil that was longer than the 12 x 12 cutting mat, so I need to select the no cutting mat option. I decided to use contact paper as my stencil (the liner rolls you find at the dollar store for your cabinet shelves) for two reasons: one, it is cheaper than stencil material, and secondly, I wanted to use Mod Podge to adhere the stencil onto the wood.
Feed the contact paper into the Silhouette or Cricut and make sure there are no items in front or back that could prevent the paper from moving freely.
For the contact paper, I used the “vinyl, glossy” setting in my Silhouette. Tip: Always do a test cut to make sure your settings are correct. Send to Cut.
Step Four: Weeding
In this step you will weed out the pieces you want to show painted on the board (remove with the tool). For example, you want to weed out all the letters because that is what you want shown painted on the sign.
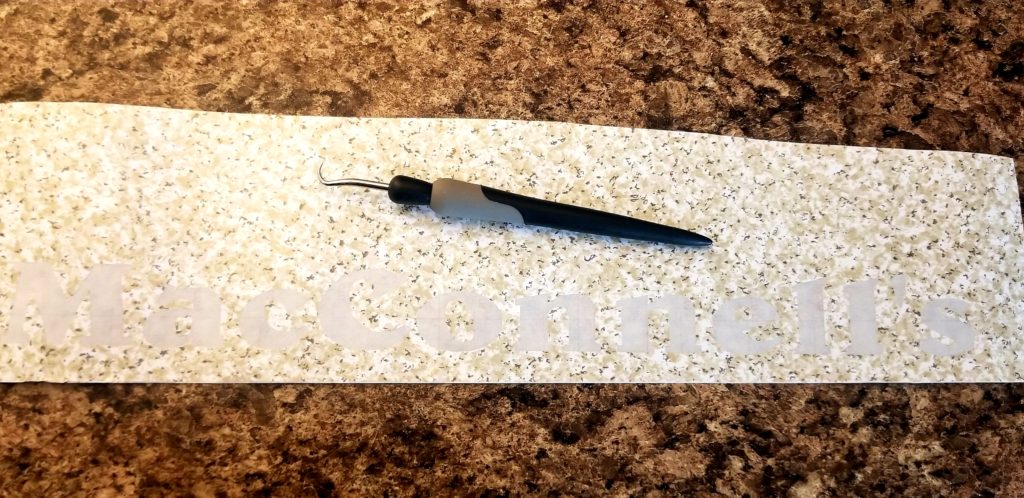
Make sure you leave a thick border around your stencil when you cut it so that you don’t get paint onto your sign in the areas around the letters.
Step Five: Placing Your Stencil
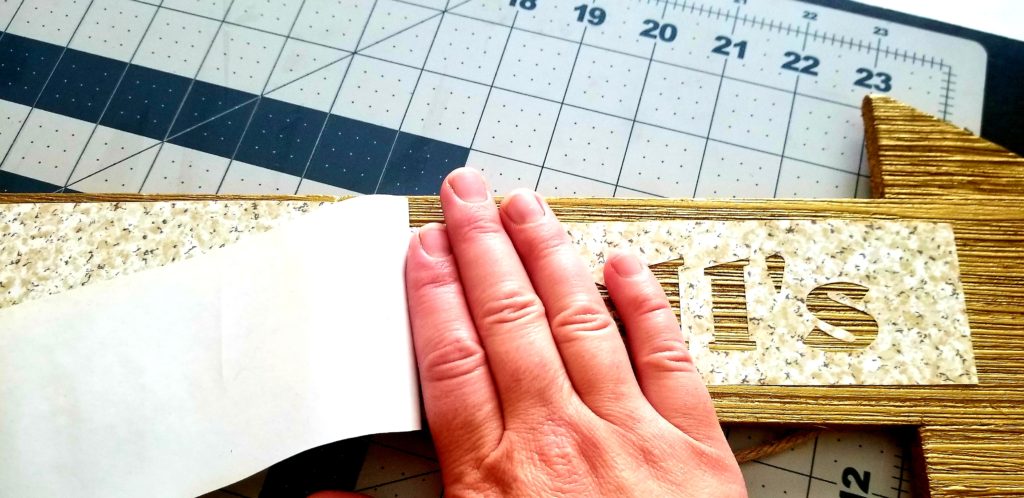
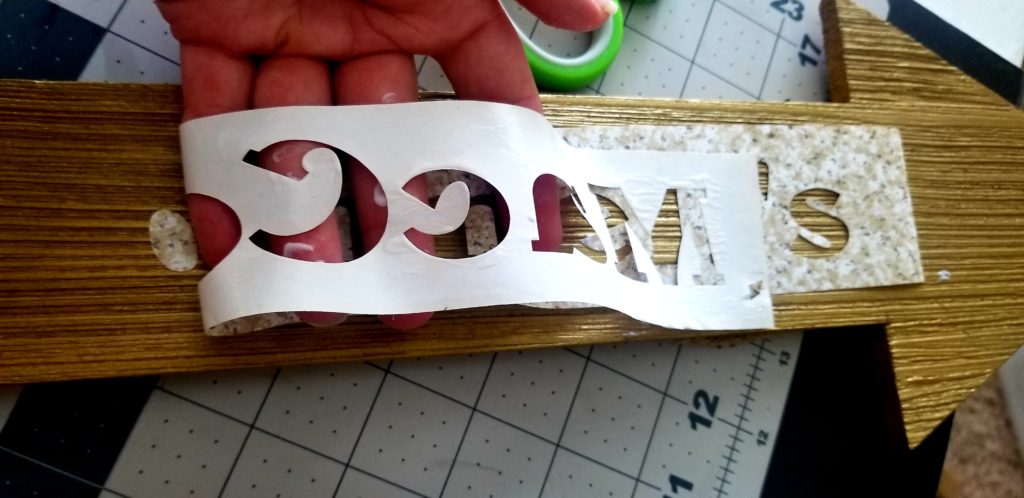
Cut a piece of contact paper a little bit bigger than your stencil. You will use this to transfer your stencil to the wood surface for painting. If you use clear contact paper, you will be able to see where you are placing your stencil and line it up more accurately. I didn’t have any clear paper on hand, so I just eyeballed it. Place the contact paper over your stencil and scratch down with your scraper. Tip: For wood projects I prefer to use contact paper instead of transfer paper. The stencil has a hard time sticking to the wood surface, so the transfer paper could remove the stencil with it if it’s too sticky. Contact paper has less adhesive, so I like to use that instead of transfer paper. If you decide to use transfer paper, I would use a piece you have previously used.

Place stencil on your wood piece and scratch down with your scraper.
Once your stencil is placed where you want it, take one corner of your contact paper and start to roll it back. I started to use my scraper tool to hold down the stencil as I rolled the contact paper but holding your hand down on the stencil as you roll works even better.
Step Six: Adhering Your Stencil (Optional)
In this step I tried a trick I saw on Pinterest: using Mod Podge to stick your stencil onto the wood before painting. This will help to prevent your paint from bleeding under the stencil. You lift part of your stencil, place a light coat of Mod Podge under, and secure it back into place.
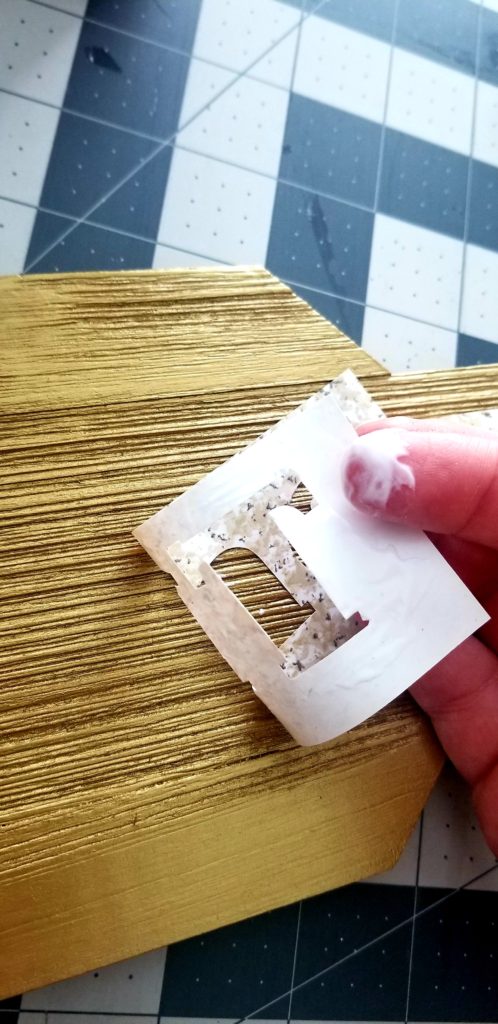
It is easier if you flip one side of the stencil over at a time and put the Mod Podge on the stencil.
The middle of the letters (e, i, o) will have to be done separately. You will need to let the Mod Podge dry before you can start sponge painting. If you can be impatient, I would suggest doing this step at night, so you can let it dry overnight.

Step Seven: Painting
Put a light coat of paint onto your sponge. Placing the sponge into the paint and doing a couple dabs onto the tray works well. Use a light up and down sponging method, make sure you cover all the letters that you want stenciled onto the wood.
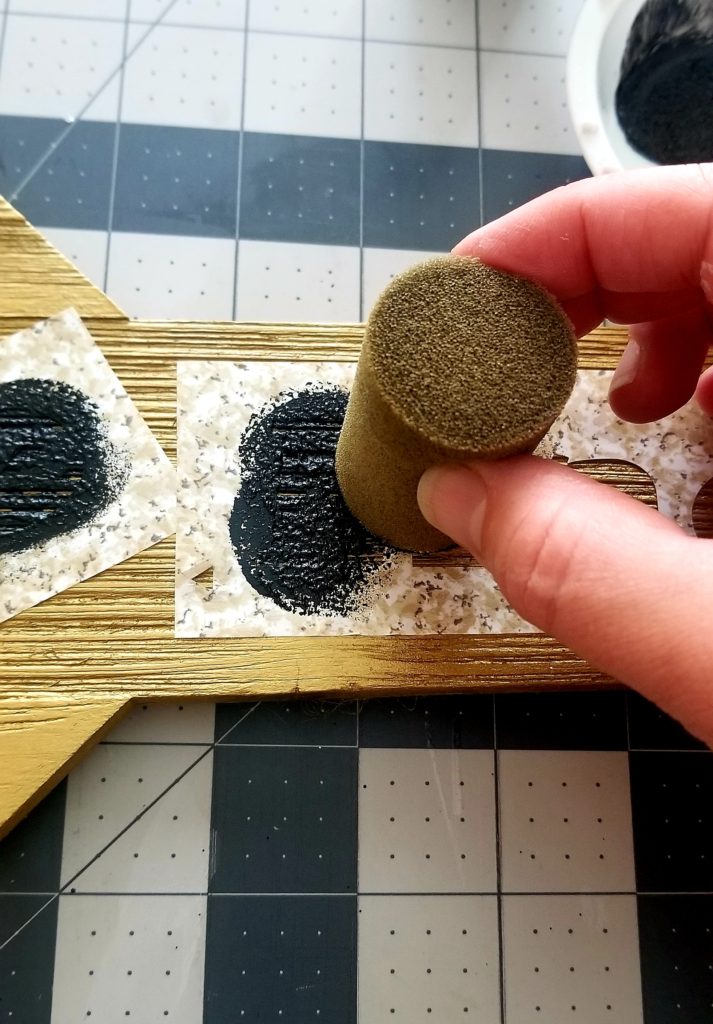
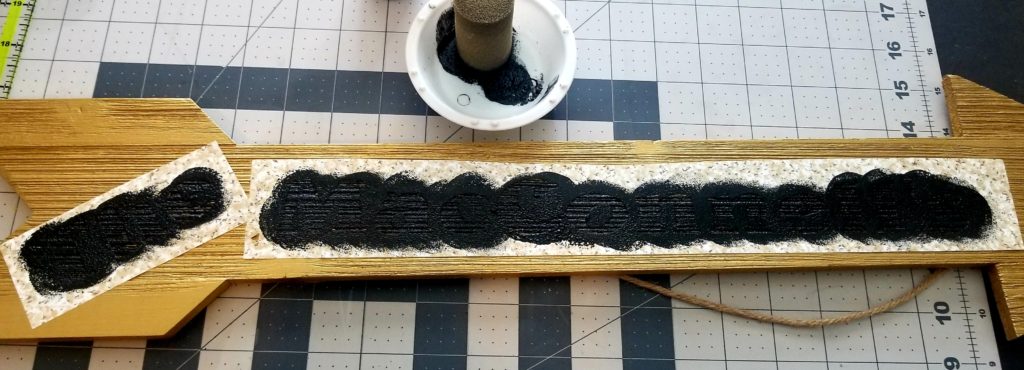
Remove your stencil directly after painting. I decided I wanted to add a little bit of character to my rectangular wood piece and added a little bit of paint with the sponge on the trim. You could also use your sander and sand the trim if you want a more rustic look.
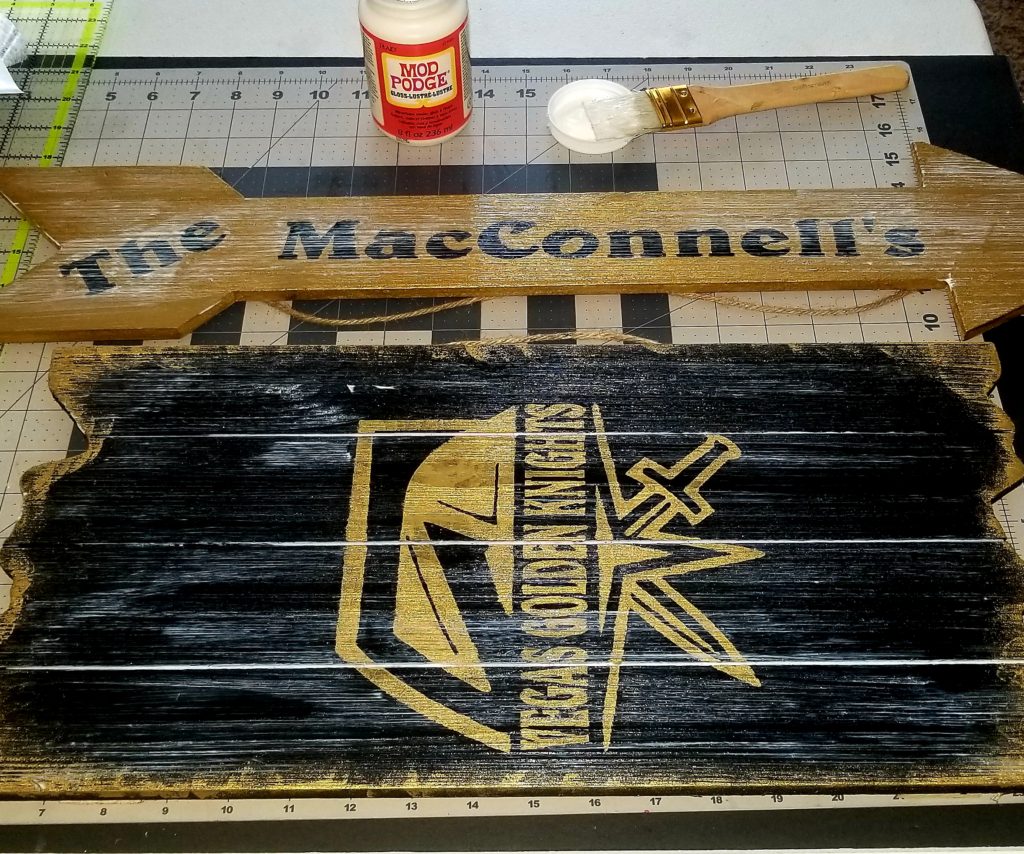
Step Eight: Coating Your Wood
This step is a personal option. I decided to coat mine with a layer of Mod Podge to give it a glossy look and fully seal it. This sign might go outside, and I did not want it to weather. You could decide not to coat your wood, decide to use an acrylic spray, or decide to use a polyurethane.
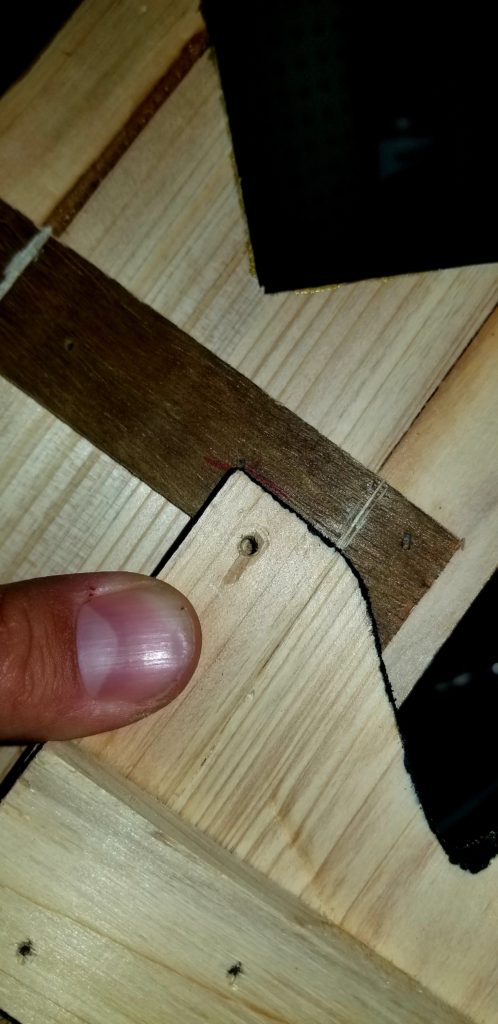
Step Nine: Finalizing Your Piece
When I started this piece, my intention was to add a VGK fabric (a bow or hanger), but my mind changed as the product got to the end. To finalize this wood sign, my husband drilled a small hole in the rectangular wood sign (so the wood would not split/crack).
He used a screw to attach the two pieces.
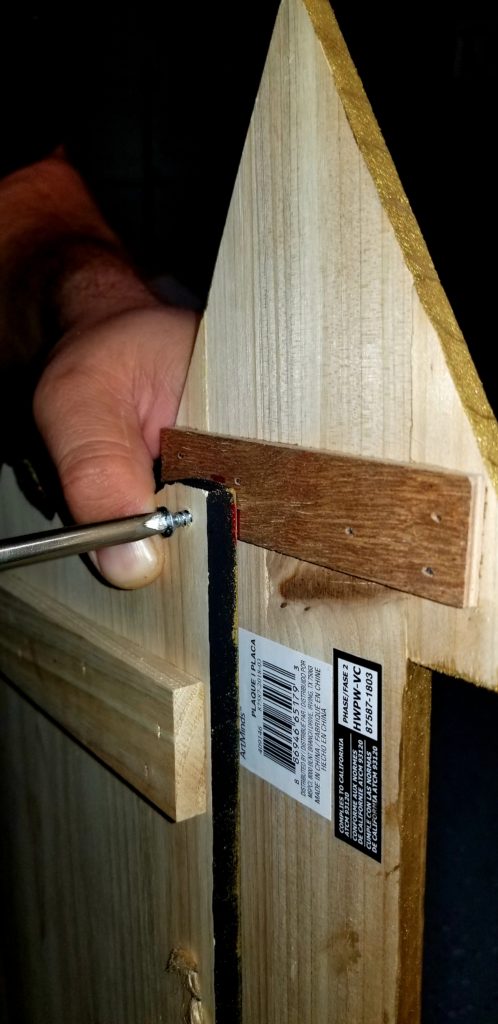
The wood sign will hang from the rope piece already attached to the rectangular wood piece.
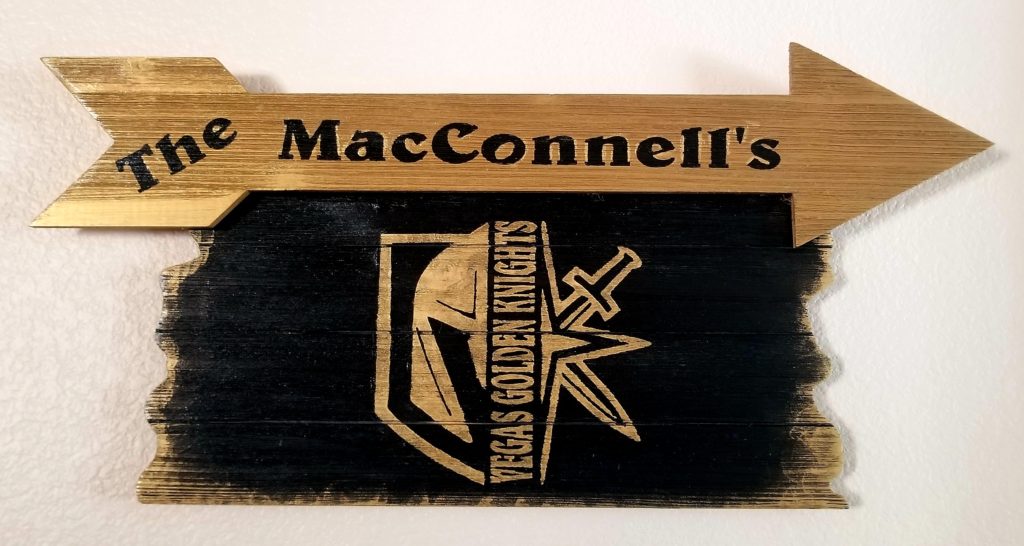
Whether the sign you create is for yourself or you are giving as a gift, I love the fact that each one of your creations will have their own personal flare to it. We would love to see how your sign turns out. Place a picture of your new sign (or signs you’ve previously created) in the comment section below.
For questions, email our resident crafter Rachelle O’Dell at rachelle@vgkladies.com
*This post contains affiliate links. For purchases made through these links, VGK Ladies makes a small percentage of the sale at no cost to you. These fees help support the cost of this website. For more info, click here.
One thought on “DIY Vegas Golden Knights Wood Sign”
Comments are closed.