Vegas Golden Knights decorated jackets… we have all seen them and if you don’t have one, I bet you wish you did! If you are like me, you don’t even know where to begin. We have seen patches, pins, vinyl, fabric, and paint added onto denim, white, sequin, and gold jackets. They are all so amazing! So we decided to help you all out with a series of tutorials on ways you can create your own, starting with PAINT!
Table of Contents
Supplies
Denim Jacket (or any material that will take paint well)
Fabric paint or Acrylic paint (if choosing Acrylic, wash on delicate, or hand wash, and line dry)
Freezer Paper
Iron
Xacto knife or Cutting machine

I’m starting this jacket not really knowing exactly how the final project will turn out, but I think that is the fun in this project. I do know I need to start with the main focus of the jacket, and the little additions can work around it. So I created a stencil to paint the VGK helmet on the back of the jacket.
Step 1: Creating Your Stencil
The first thing you need to do is measure the area you want your logo to be placed. Make sure there is enough space for the freezer paper to stick. The back of the jacket has a seam going down both sides, so I made sure my image was going to be at least an inch away from both seams. I made my stencil 6.5” x 8.5”.

There are a few ways you can create your stencil. If you print out the image you want, you can use an Xacto knife to create your stencil on freezer paper. You will want to cut the image out with the paper side up. I decided to use my Silhouette Cameo because it’s quick and precise. I cut a 12 x 12 inch piece of freezer paper and placed it on my cutting mat with the shiny side up (this will eventually be the side you stick down with an iron onto the jacket). Feed your mat into your machine and cut your design just like you would if you were cutting on heat transfer vinyl. Make sure your image cuts mirrored, so when you place the stencil down on your jacket it will not be backwards.

Step 2: Preparing Your Stencil
Let your iron heat up. I put mine on the cotton setting with no steam. Time to weed! You will want to “weed” out the pieces of paper you do not need for your stencil, leaving only the areas you want to be painted on the jacket. Be very careful because the freezer paper can rip easily. Once your stencil is ready, place it shiny side down onto your jacket. It can be tricky, so I decided to do one piece at a time and ironed it in stages. I started with the outer piece and worked my way in. Iron your stencil until it sticks. If you make a mistake or find a piece is crooked, you can remove and try again. I would only suggest doing in once because it might not stick as well. (I had to reposition my helmet part once).


Step 3: Time to Paint
Time to paint! EEEE! This part made me so nervous, this is my first time doing this method and most every time I do anything with a stencil it doesn’t work perfectly; I find myself always doing touch up. With paint on fabric you can’t just wipe it off without washing it right away, so be very careful with your paint. I recommend using a stiff bristle brush. Use a dabbing method to add your paint. Make sure you don’t use regular paint strokes, or the paint might bleed through the stencil.


Time to remove the stencil and hope it did not bleed. It’s best to remove your stencil right away, being very careful while pulling the stencil off. Use tweezers if needed. Discard stencil pieces away from your jacket to avoid the risk of touching.
TADA!!! I could not believe it!!!! It came out perfectly.

Step 4: Setting the Paint
The paint dries very fast, but I didn’t want to risk moving it. I let the jacket dry overnight. You can set your paint by heating up your iron, placing a thin cloth over your image, and ironing over the paint for a few minutes until it gets warm. If you don’t have a thin piece of cloth you can can iron the inside of the jacket, opposite where the image is painted. You can also throw it into the dryer.

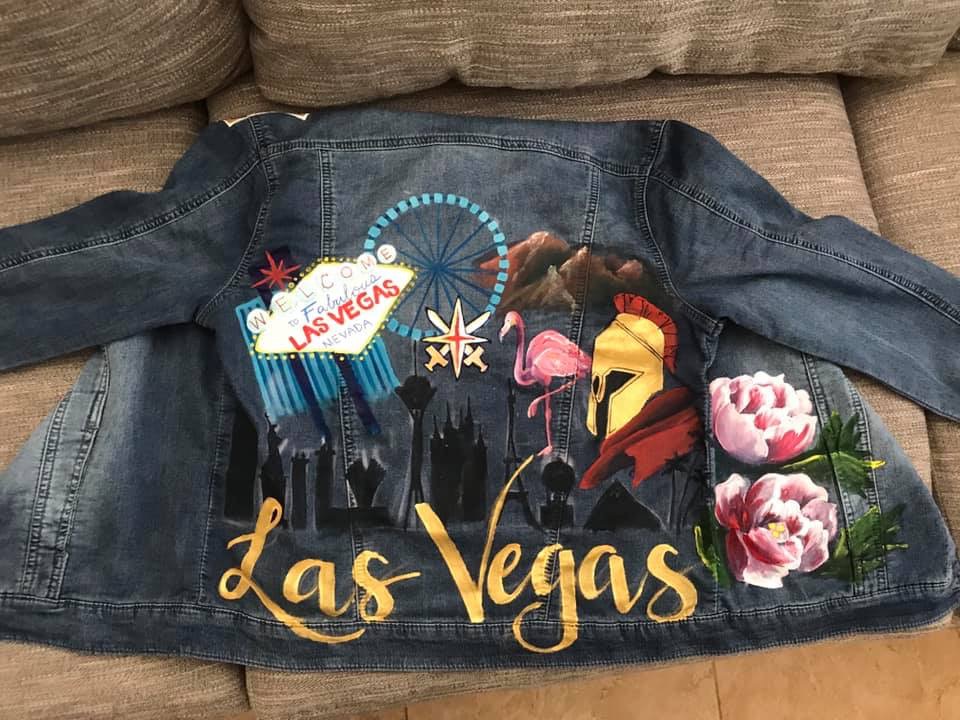
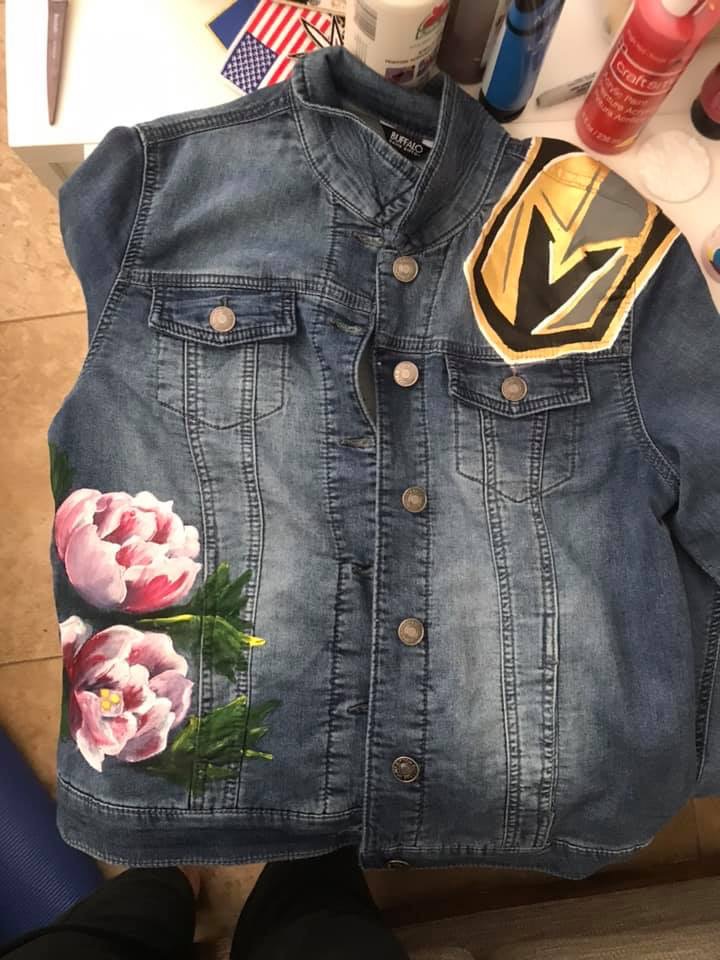
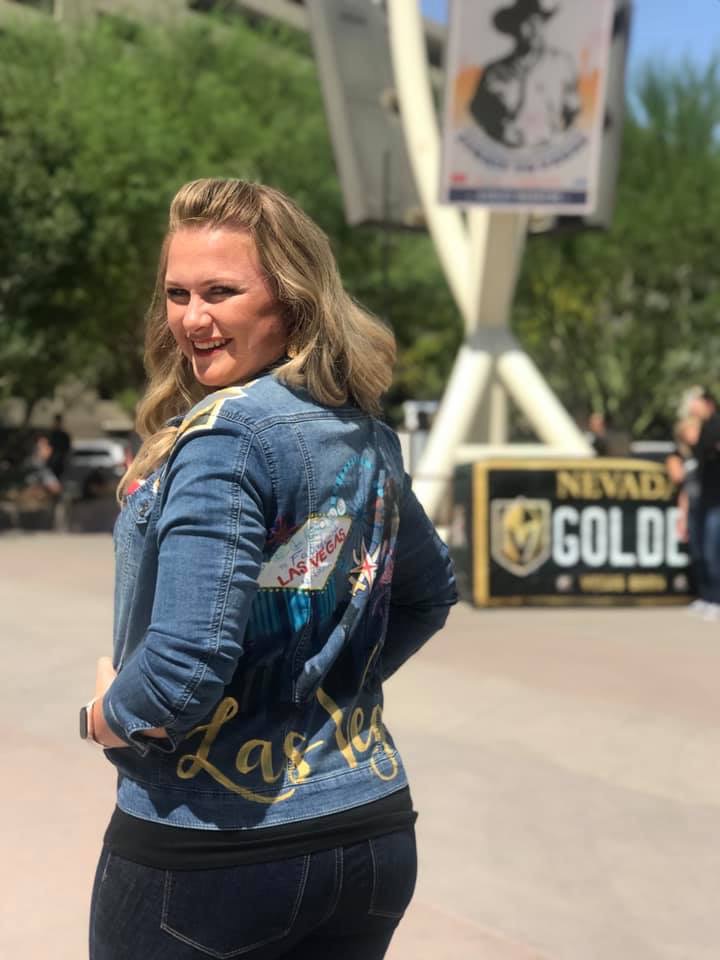
I can not wait to paint more onto the jacket! This process was so much fun! The ideas are up to you and your imagination when it comes to painting. You can add your favorite player’s name, player’s number, your name, donuts, flamingos or Las Vegas images. I am also going to check out what patches I have and get them sewn on at the VGK Ladies Jacket Design and Patch Event!
Want more inspiration? Check out what one of our very talented VGK Ladies have done:
Elizabeth Young